For the second part of the 'PVA, tights and a chair' project we had to take the hardened structure off the chair...
...and work with it on the mannequin.
We wrapped the top on the mannequin with cling film, making a kind of under garment. Becasue we wanted to use all parts of our structure.
We then put the structure onto the mannequin in various ways.
After working with the structure on the mannequin, we put the mannequin on a model :)
The structure we made when using 1 chair became a bag. (shown on the image on the right.)
I did not really enjoy this project because it was not as excitng as other projects we have done, and I did not really like the outcome of our structure.
Rule Based Art - Part 2..
This week continuing from 'Rule Based Art - Part 1' we had to do the same thing as last week [applying my 3 rules to my starting shape which was a square, and coming up with different shapes.] However this week we had to enlargen the shapes so that we could work with them on a mannequin.
I enlarged my shapes by 3. So last week I had a 10cmx10cm square and this week i'll be starting with a 30cm x 30cm sqaure.
With this project I wanted to work with colour so i decided to use brown and white paper, to make the look more interesting.
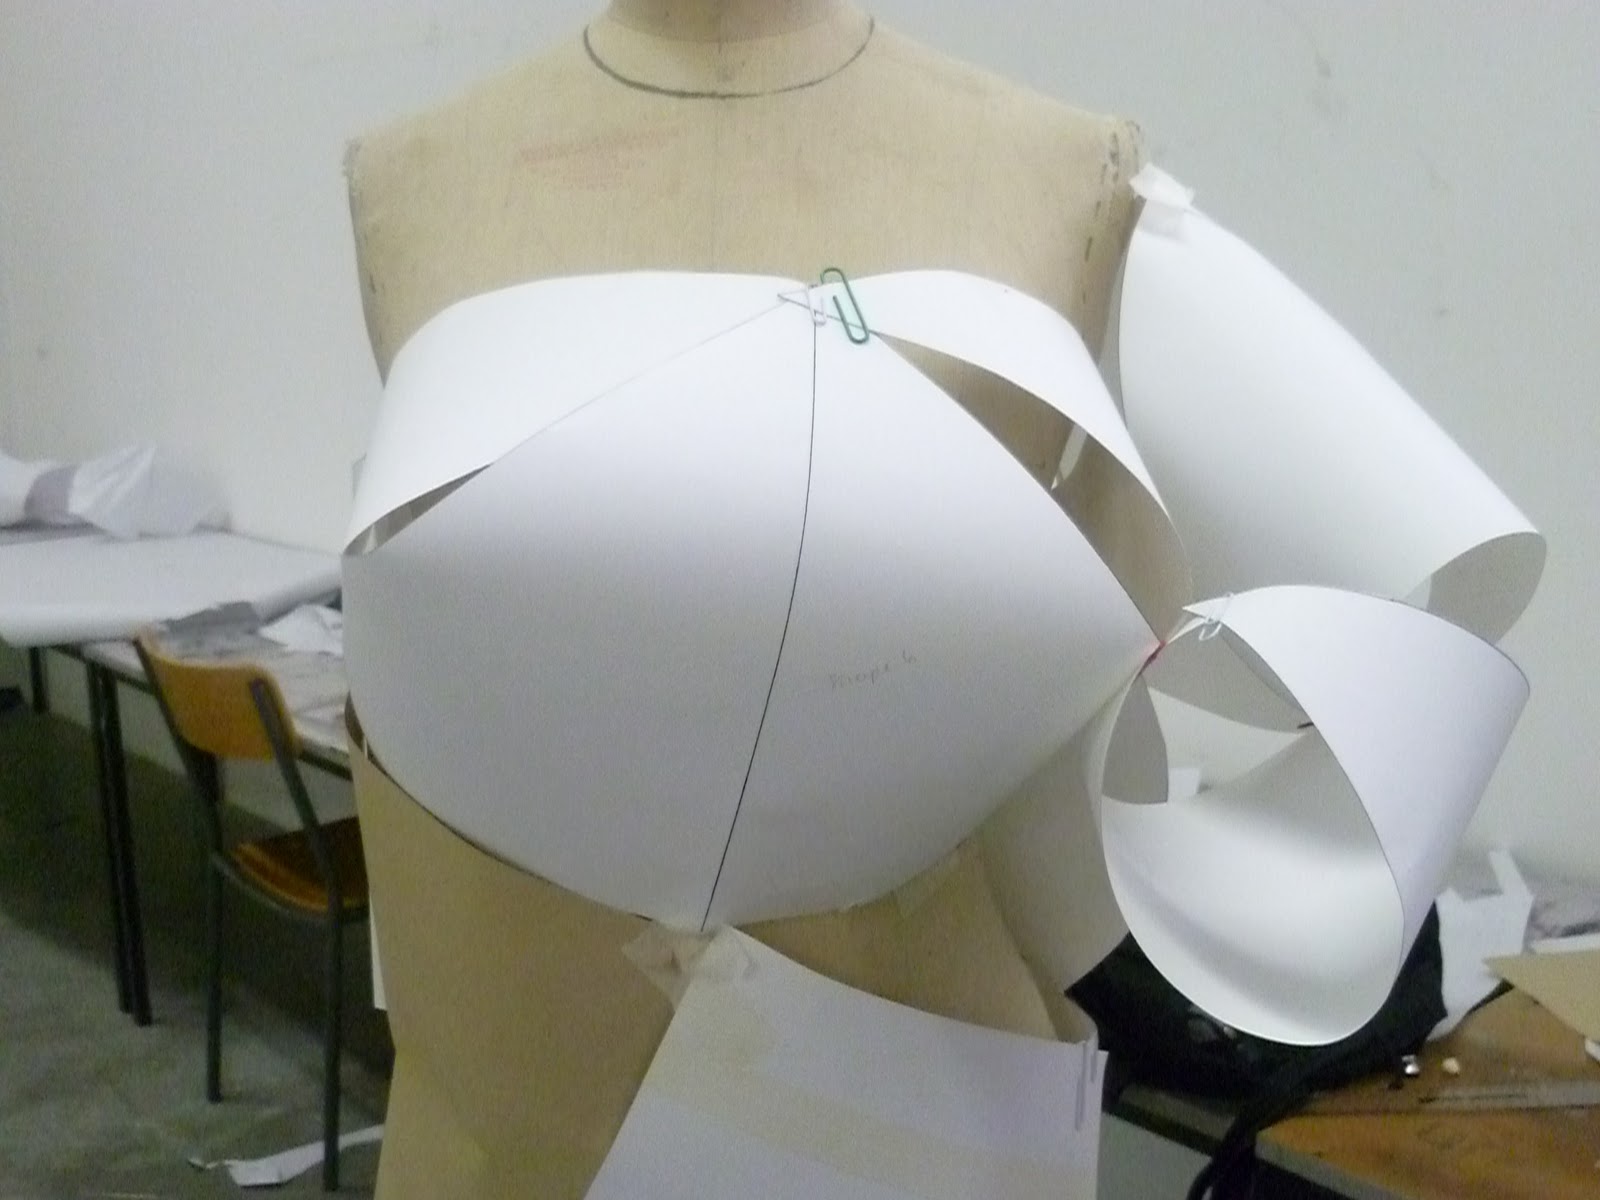
I then began to work with my shapes on the mannequin...
Front view Back view
Front view
Back view Rigth side view Left side view
...I then took all my shapes off and tried to work with them again in a different way...
Front view
Back view Right side view Left side view
After working on my own I had to pair up with a partner and combined our shapes together to come with 1 piece on the mannequin....
We first had to work with our shapes off the mannequin and then put what we have made on the mannequin...
Front view Left side view Back view
Right side view
Like before we took after our last piece that we made and repeated the making the piece off of the mannequin and then putting it back on...
Top front view
Back view Front view Side view
After the 2nd piece we made, we had to crumple up the paper and put the piece back on the mannequin seeing what we come up with...
Front view
Back view Right side view Left side view
I thought this garment from Comme des Garcon's Spring 2010 collection realted to this project, because of the way the piece of the garment are miss-matched and then just put together, like what I did with my work.
Rule Based Art - Part 1
This week we had to the make rules and apply them to a shape.
I started off with was a 10cm x 10cm square.
I then came up with 3 rules which were:
1.Subtract a triangle
2.Add a triangle
3.Add a smaller triangle
You always have to continue applying your rules to your shapes. The outcome is that you should come up with different shapes which are either getting smaller or larger, preferably larger.
After coming up with 12 different shapes I went over them with a black pen so that they were move visible.
Then I traced them onto another sheet of pattern cutting paper...
...and then cut the traced shapes out.
With the cut out and traced shapes I folded them and turned them into 3D shapes.
This was my favourite shape. Number 11, just because of the angles and how you can see inside.


